

Today I’m super excited to be back with the second episode of my new series: Basic Bitch Tries… You can find out a bit more about it in Episode 1, but basically it’s a series where I test out Insta/MUA makeiup tutorials to see if your average individual can do them. Today I was a bit ambitious as my friend Emily suggested that I attempt this gold double cut crease look by Amy’s Makeup Box, and I was more than a bit apprehensive for this one as I’d never attempted a double cut crease before. I’m always eager to give new things a try, but prewarning: this one does not turn out as acceptable as the first one, but that’s ok as this series is about seeing the positive in my attempts and reminding myself that I’m not a professional and that’s alright. I included my mistakes just so you could see that it’s okay to make them as well, and also that I’m able to laugh at and learn from them. So yeah, let’s get into it; I hope you enjoy seeing me try and conquer my nemesis (eyeliner of any kind)!

So first of all I should probably mention that to follow this tutorial, I’ll be using ABH Modern Renaissance, Subculture and Too Faced Sweet Peach. To start with, I’ll be dipping into Tempera and putting it all over my lid area as a base.

And then…this is where it started to go south (already, Carla!?). So I grabbed my MUA liquid eyeliner and put a bit on my Spectrum A09 Angled Eyeliner Brush (it’s not a gel liner so we were already off to a poor start), because I wanted a bit of a finer line. But me being me I just could not get it right. I have such shakey hands and I suck at precision; this was like my 800th attempt and my eyes were raw from scrubbing at them, so I decided to go for something a bit different.

 I picked up a bit of the darkest contour shade from my Technic Cream Foundation Contour Kit on my liner brush and used that as my base line as I thought it would be easier to clean up that angrily scrubbing away eyeliner everytime. It did work a lot easier and I know it doesn’t look great/right at all, but don’t forget – this is not a professional tutorial haha. I knew that I’d have to keep on topping it up bc it’s not the strongest thing ever and in retrospect I probs should’ve set it, but ah well I’m learning.


Then I went over the top of the line with a bit of Dawn as a transition shade to prepare for the darker colours.


I then brightened up the second crease area with a bit of Roxy, which gave it a nice warm pink/orange tone.
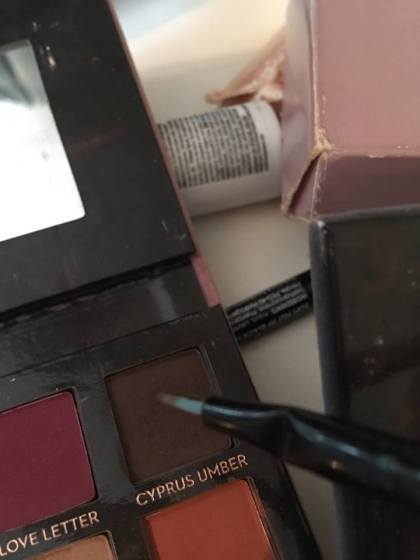

I then topped up the line a bit using Cyprus Umber, and I also used a bit of Dawn to diffuse the brightness of Roxy a bit.


I then went in with a bit of Charmed, I’m Sure and tried to be as precise as possible in putting it nearer to the line, but it ended up being a lot higher, so I just blended it out and ran with it. I also took a bit of Rowdy on my liner brush to darken up the line a bit more.


I then attempted to pack a mixture of Peach Pit and Rowdy really close to the line to try and make a sort of gradient effect, but as you can see it did not turn out the greatest lmao.

This picture is my attempt at cleaning up the dark eyeshadow cloud I created using Dawn and Roxy and some aggressive blending to try and force the gradient effect. I managed to sort of save it to the degree I was capable of.


I then moved onto my favourite part of the look (as not much can go wrong with shimmers, really), and I packed a lot of Primavera onto the lid and the area just under the line.

Then we were right back into my worst nightmare as I went back in with my liquid eyeliner. I drew out to where I’d usually go to make a wing, and then I drew a line from the top crease of my eye and connected the two lines. I then drew a line from the crease in the centre of my lid and then connected it to the top line.

I then sort of coloured in the spaces between the lines, and lined my lid in the usual way, connecting it to the bottom of the wing I just did. (I know it looks super shakey, but I feel like at this point I don’t even need to mention it haha).

I then took a bit of Rowdy/Peach Pit again and faded out the block of liner into the centre of the lid to make sure that it looked like a bit of a gradient/ attempt to make the look seem a bit more seamless (ayy). I had to end up taking it so far across the lid because I tried to neaten up the top line and me being me, I went too far and had to make the look way more dark to compensate (classic).


I then used a mixture of Cobbler and Georgia to line my lower lash line and tie it in with the red/orange tones of the look. It also just added a lot of warmth.

")

")

I popped in some final comparisons so you could get a sense of how I did vs the original look. As you can see…it’s really not amazing. It turned out way too dark and super messy and muddy-looking. Plus I didn’t use normal eyeliner for the top crease line, so it wasn’t really destined to go right from the get-go; the overall shape of the look just seems kind of off.
However I feel like if I removed the wobbly top line and made a crease I can work with, I feel like the dark/gold smokey eye look could be a wearable look that I could get down with. Plus it isn’t a complete twin of the original look ofc, but I feel like my look and Amy’s look are at least step sisters?
Now, would I say this tutorial was achievable? I would say not exactly. I think for someone who struggles with eyeliner this is not something you can just whack out on your first try and have it look as effortless as the person in the tutorial. I think with a bit of practise it could be pulled off (as is true with most things), but I’m not in a rush to try it again as it was super stressful and the constant correction of mistakes did not make my eye happy! So basically if you’re looking for something low-stress and low-effort, this is probs not the look for you. But I was fairly proud of what I accomplished in like the 40 minutes it took me to pull this off regardless.
Let me know in the comments if you’re enjoying the series/what you think of it so far, and also let me know if you have any suggestions of looks or trends for me to try!


I love this series! Keep them coming 😃
LikeLiked by 2 people
Aaa thank you I’m so glad! I will 😄
Carla x
LikeLiked by 1 person
I think the problem isn’t in your skills, but the form of your eye. Some eye looks don’t go well on everyone.
But if you take the upper line, your make up looks super nice! Lovely post xx
LikeLiked by 2 people
Thank you so much, hadn’t considered the shape! Am glad you liked it! ✨
Carla x
LikeLike
You did a better job than I would have, girl!
LikeLiked by 2 people
Aw thank youu, I’m sure you’d do great!
Carla x
LikeLiked by 1 person
Totally agree with Katelyn! I would never have been able to achieve this. I’ve never even tried a cut crease before lol.
Di from Max The Unicorn
LikeLiked by 2 people
Thank you! It was definitely a challenge 😂
Carla x
LikeLike
I’ve never tried a cut crease because I’ve always been scared about sucking at it, but you did a great job here!
Hannah
Floraful
LikeLiked by 1 person
It’s really difficult but give it a go, you might surprise yourself! Thank you 😄
Carla x
LikeLike
I don’t think I would have been able to accomplish this look. I still learning what works best for my eye shape. I think you did great. http://www.mrsqbeauty.com
LikeLiked by 1 person
Eye shape is always a struggle isn’t it 🙈 Thank you!
Carla x
LikeLike
I think I said this the first time, but eye shape. I’ve tried different techniques from what I’ve seen other people do, but no matter how closely I followed their tutorials, cut creases never seemed to look good on me. It took me a while to figure out that it was my eye shape. Some people have a bigger eyelid than others and that totally can change the way the look turns out.
Overall, I do like how blended your eyeliner is to the eyelid shade 🙂
LikeLiked by 1 person
I find it soo difficult figuring out my eye shape like legit it probably is that. I always make so many mistakes with eyeliner anyway though 😂Thank you – it took me ages haha!
Carla x
LikeLiked by 1 person
You’re not alone girl, I can’t figure out my eyeshape either, and it doesn’t help that when I was little I was bitten by a mosquito so one of my eyes look slightly different now LOL
Anyway, you did better than I could have done. I’ve tried cut crease and the line looked so thick hahaha. Can’t wait to see the next look! ❤ xx
LikeLiked by 1 person
You did a great job!! I’ve only ever done it twice and it’s not easy with almond shaped eyes either. I had to learn that about cut creases. It looks great on deep set eyes!!! Hooded eyes struggle is real too.
LikeLiked by 1 person
Aw thank youu!!
I’ve been practising doing it more and more but it’s so hard to make it exactly right for your eye shape 🙈🙈
Carla x
LikeLike